Posted in: All Things Jewelry
 Photo copyright SomethingTurquoise
I'm so excited to share these DIY ring holder tutorials with you today. Two of the three are super simple and pretty quick, too. One of them takes a bit more time and effort, but the reward is worth the work.
Photo copyright SomethingTurquoise
I'm so excited to share these DIY ring holder tutorials with you today. Two of the three are super simple and pretty quick, too. One of them takes a bit more time and effort, but the reward is worth the work.
3 DIY Ring Holder Tutorials
Marble Ring Cones
This step-by-step tutorial by SomethingTurquoise provides easy instructions for making faceted marble ring holders out of oven bake clay (polymer clay). Before you begin, gather the following supplies: oven bake clay, a clay knife, parchment paper, a baking sheet, clear glossy spray (optional). With a little ingenuity, you can modify these to add a dish at the base. Also, you could make them rounded instead of geometrical. So many options!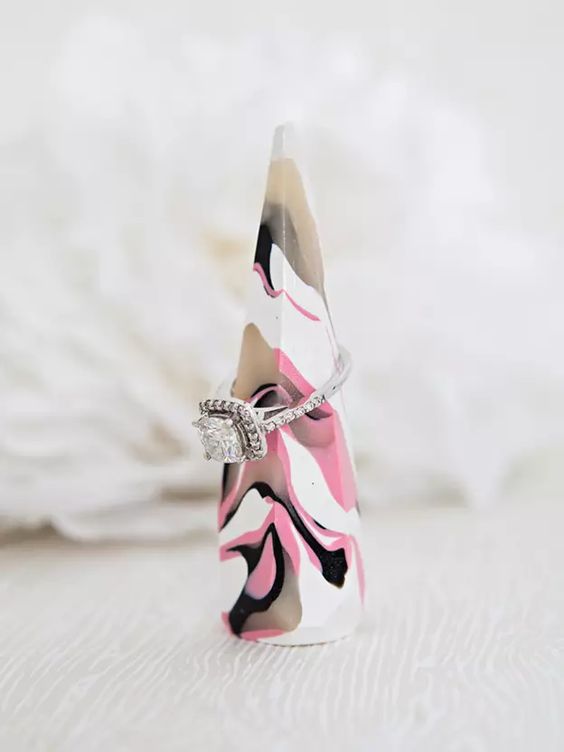 Photo copyright SomethingTurquoise
Repurpose Old Nail Polish Bottles
This clever idea from Crafty Chica uses old nail polish bottles to make a fashionista DIY ring holder. Find the following supplies before you begin: old nail polish bottles, terracotta plant dishes (or other small dishes), adhesive, spray paint, rubbing alcohol (to remove labels from bottles), and decorative elements (faux gems, etc.). Again, the possibilities prove endless with this idea - think old perfume bottles, apothecary bottles, and other glass bottles.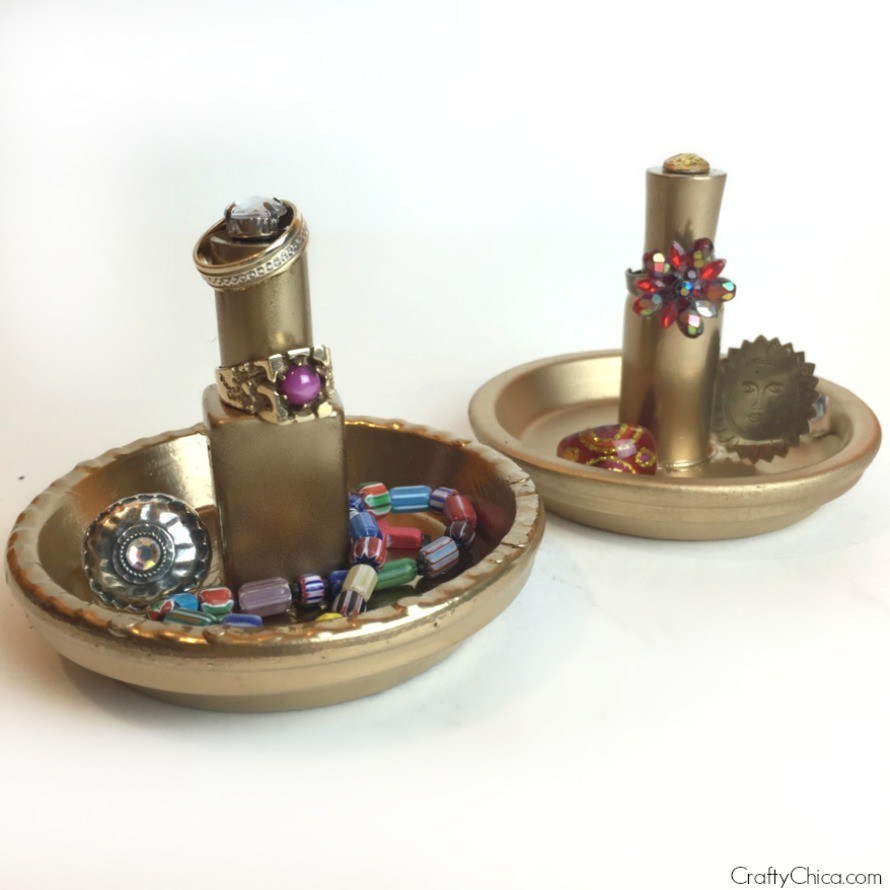 Photo copyright Crafty Chica
Make Your Own Hand Mannequin
Although this tutorial by DIY Projects requires more time and extra crafty skills and supplies, having your own hand mannequin at the end justifies the means for sure! Before beginning, acquire the following supplies: plaster powder, a bandanna (since you donated your dust masks to your local hospital), some kind of rubber or latex glove (choose a size and shape most desirable to you), a plastic water pitcher, a flat piece of cardboard, popsicle sticks, black electrical tape, a roll of masking tape, a marker, scissors, a hot glue gun, glue gun sticks, paint, and fine grit sandpaper. I added a few supplies to the list that are not listed in the tutorial. First, the popsicle sticks, black electrical tape, and roll of masking tape. You will see in the tutorial that you need to secure the glove over the water pitcher before pouring in the plaster. These supplies aid in that process. Also, if you do use a textured rubber glove, you might want to use fine grit sandpaper to rub out the texture for a smooth look.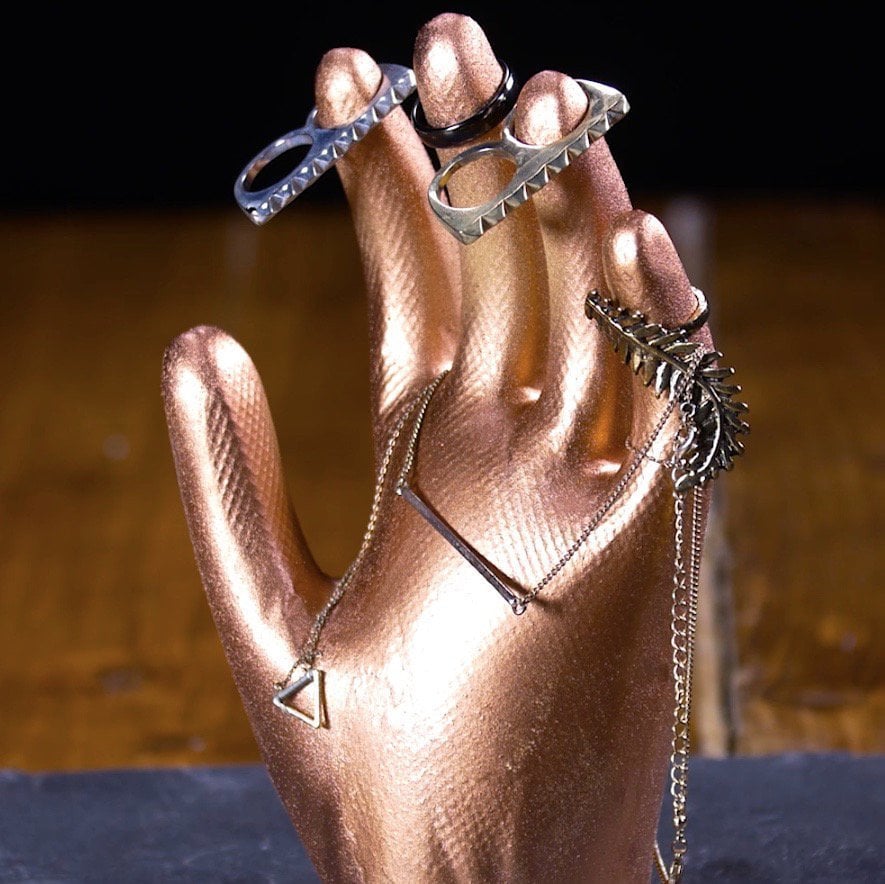 Photo copyright DIY Projects
Please let me know if you tackle any of these fun projects. I'm definitely contemplating the first two. Maybe they will inspire me to try the third one, as well. Whatever you decide, I hope you know I'm thinking of you as you sit at home in these difficult times!
~Angela Magnotti Andrews
Photo copyright DIY Projects
Please let me know if you tackle any of these fun projects. I'm definitely contemplating the first two. Maybe they will inspire me to try the third one, as well. Whatever you decide, I hope you know I'm thinking of you as you sit at home in these difficult times!
~Angela Magnotti Andrews 4 years ago
19 view(s)