Posted in: Jewelry Solutions
 Proper necklace storage ensures minimal wear and tear, helping to maintain the value of your jewelry. Furthermore, it provides organization and even some added beauty. Many DIY necklace storage options provide decorative value as well as functionality. Today I offer three fun and decorative necklace storage projects for you to consider.
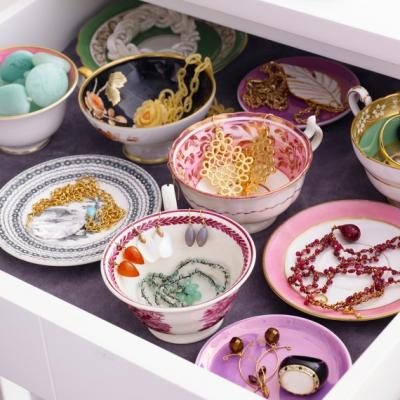
Easy Teacup Necklace Storage
I found this idea on TruFauxJewels and immediately fell in love with it. For one thing, it’s perfect for storing antique necklaces, which should be stored flat and covered. Also, it's just lovely. Simply empty the top drawer in your dresser. Then fill it up with antique teacups and saucers in any arrangement that pleases you. Assign your jewelry to one of the cups or saucers, and voila! Easy peasy necklace storage solution! Remember to place only one piece per cup or saucer, unless you can easily keep them from touching even while closing the drawer.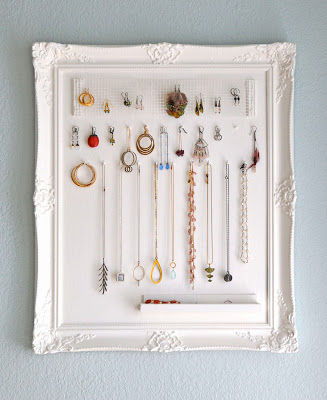
DIY Wall Frame Makeover
I found another great DIY idea from MonaLuna. All you need is an old frame, some paint, some simple hardware supplies, glue, wire cutters, and a stapler. If you want to add a little box at the bottom for storing rings and earrings, you also need a piece of scrap molding. A piece of plywood glued into the frame serves as the backdrop for mesh, earring and necklace hooks, and the molding box. Following Jennifer’s tutorial makes this project easy. Just remember to use this DIY frame makeover only for costume necklaces. Fine jewelry, as well as antique and vintage necklaces should be stored flat to protect them from damage.
Modern Canvas Necklace Display
If you’re looking for a modern take on jewelry display, I recommend trying Alicia Powell’s DIY jewelry display canvases. All you need is a collection of 12 x 12 canvases, flat-bottomed wooden beads, a glue gun, wall hooks, a pencil, and a ruler. Follow her simple tutorial and have fun laying out different geometric design options. She recommends laying everything out on the ground ahead of time, including where you plan to place each jewel. Then, take a photo to refer to as you’re outfitting each canvas with the wooden beads. After the glue dries, hang the canvases on your wall and have fun placing your individual jewelry. Not only will you have great storage for your necklaces and earrings, but you’ve also created your own modern wall art to add flair to your room. How fun is that?? So, which one of these tutorials do you plan to try? Will you take a photo of your finished piece and share it here in the comments or on Facebook? We’d love to see it! ~Angela Magnotti Andrews4 years ago
2 view(s)